How to use Saved Search Feature on Grids in SmartClient

Saved searches are a must-have for many web applications involving thousands or millions of rows of data.
Imagine having to set search criteria for multiple fields, sort, or add new columns every time you start a new session.
If you’ve been there, you know how vital a saved search feature is. You can easily save search preferences and retrieve them with just one click.
With SmartClient, you have a built-in feature that lets you save search preferences on grids. Instead of repeating the same process time after time, you can save a lot of time for other productive activities.
Create the DataSource
We are going to be using one of the built-in DataSources: employees DS.
<DataSource isSampleDS="true" ID="employees" serverType="sql" tableName="employeeTable" recordName="employee"
    testFileName="/examples/shared/ds/test_data/employees.data.xml" titleField="Name">
    <fields>
        <field name="Name" title="Name" type="text" length="128" />
        <field name="Job" title="Title" type="text" length="128" />
        <field name="EmployeeType" title="Employee Type" type="text" length="40" />
        <field name="EmployeeStatus" title="Status" type="text" length="40" />
        <field name="Salary" title="Salary" type="float" />
        <field name="MaritalStatus" title="Marital Status" type="text" length="10">
            <valueMap>
                <value>married</value>
                <value>single</value>
            </valueMap>
        </field>
    </fields>
</DataSource>
Build the UI for the Saved Search feature
First, start by creating the ListGrid for the Saved Search UI. Bind the employee DS to the ListGrid by setting: dataSource: savedsearchDS and showFilterEditor: true.
Note that the employee DS is imported and assigned to savedsearchDS: (var savedsearchDS = isc.DataSource.get("employees")).
isc.ListGrid.create({
    ID: "savedSearchGrid",
    left: 50, top: 50,
    width: '100%',
    dataSource: savedsearchDS,
    autoFetchData: false,
    autoFitData: "horizontal",
    autoFitFieldWidths: true,
    leaveScrollBarGap: true,
    canGroupBy: true,
    autoDraw: false,
    canFreezeFields: true,
    canAddFormulaFields: true,
    canAddSummaryFields: true,
    dataSource: savedsearchDS,
    autoFetchData: true,
    showFilterEditor: true,
    allowFilterOperators: true,
    fields: [
        { name: 'Name', title: 'Name', width: 100 },
        { name: 'Job', title: 'Title', width: 100 },
        { name: 'EmployeeType', title: 'Employee Type', width: 40 },
        { name: 'EmployeeStatus', title: 'Status', width: 40 },
        { name: 'Salary', title: 'Salary', width: 40 },
        { name: 'MaritalStatus', title: 'Marital Status', width: 80, valueMap: ['married, single'] }
    ]
})
With the savedSearchGrid ready, create a VLayout, and add the ListGrid to it.
isc.VLayout.create({
    ID: "MainUI",
    autoDraw: true,
    width: 750, height: 540,
    layoutMargin: 15,
    members: [savedSearchGrid],
    groupTitle: "Saved Search"
});
How to save searches on grids
By default, SmartClient provides options to store search preferences on every grid you create. This means you can store and reapply grid configurations, including criteria, column sizes, sort, and even user-created columns.
Once your grid is running, create and store the search preferences for savedSearchGrid by right-clicking on any column header. From the drop-down list, select “saved views, and click “save view”.
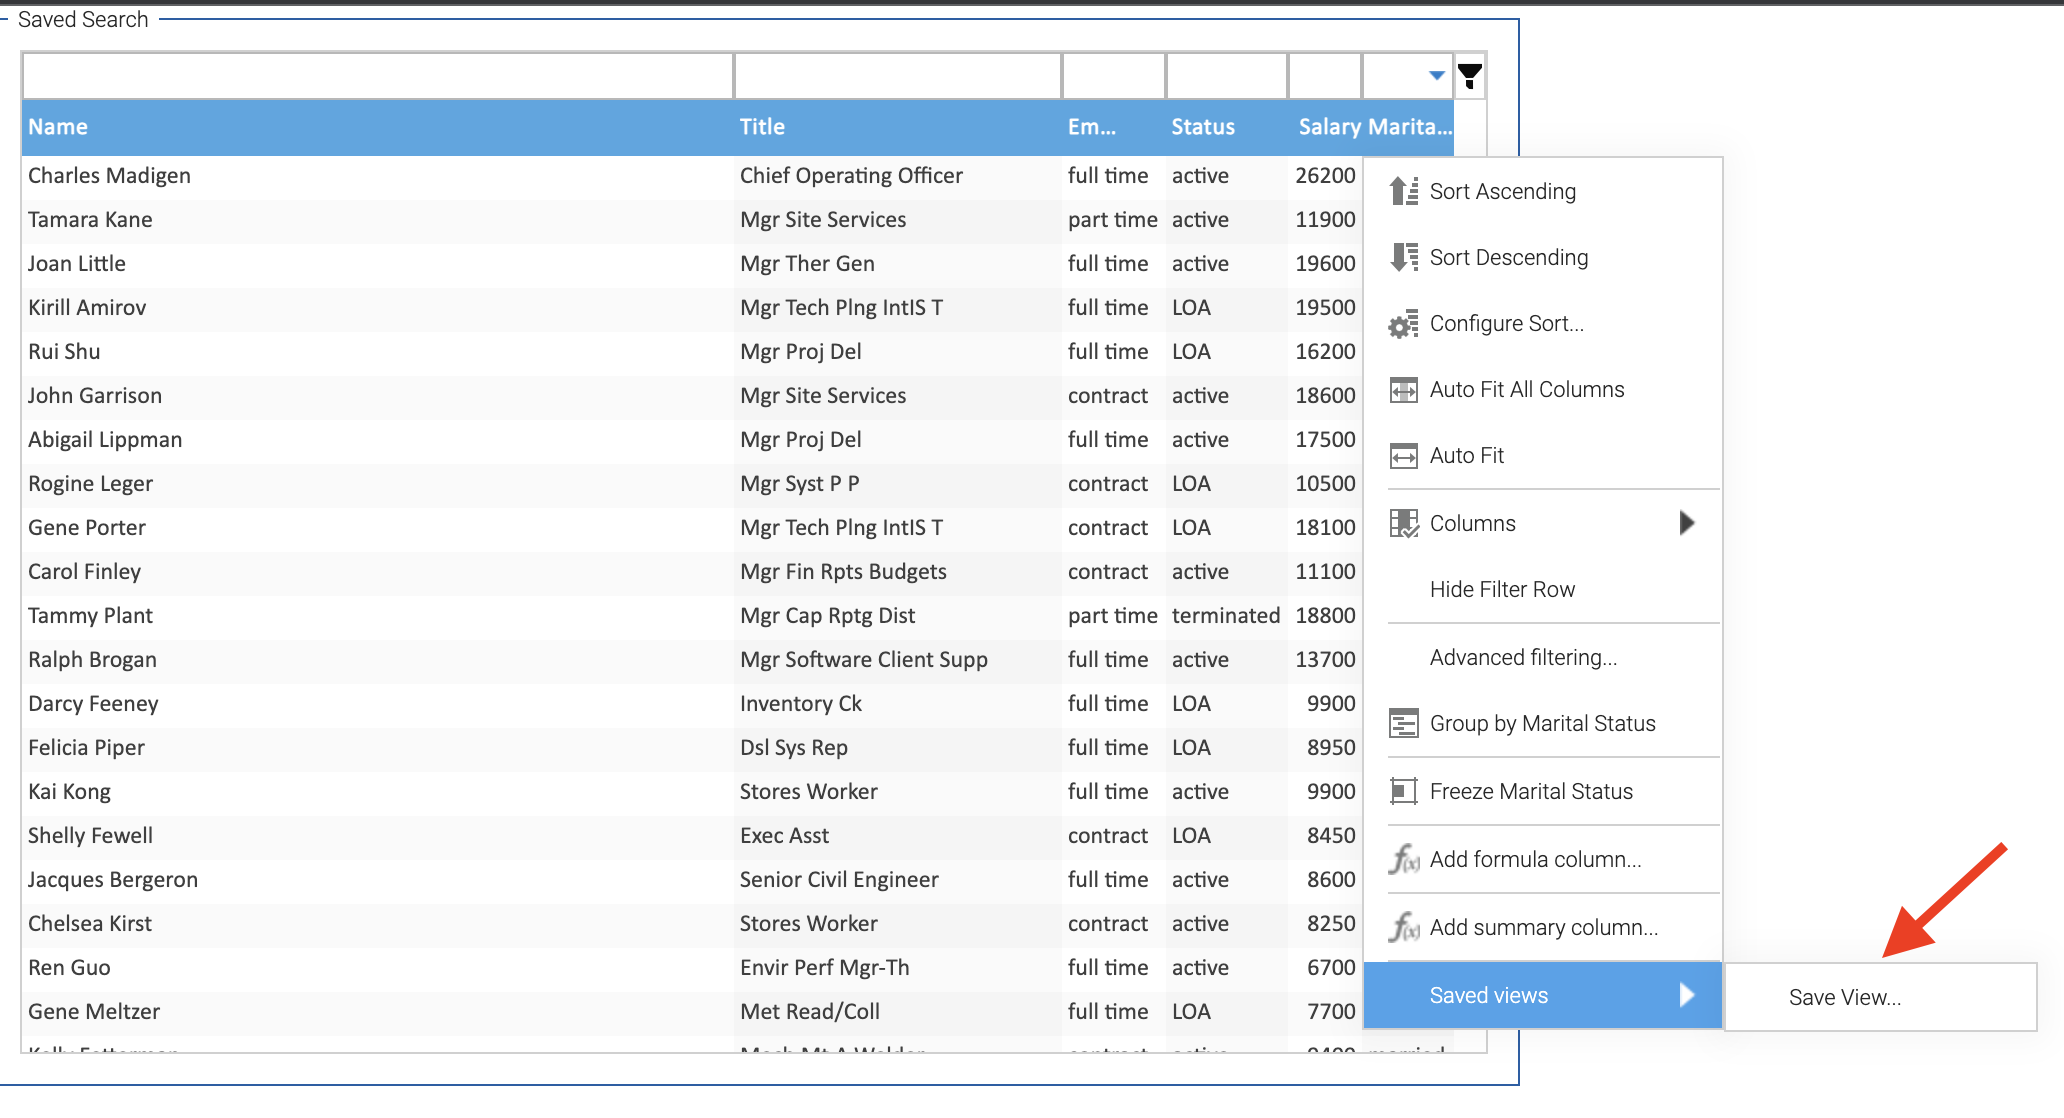
Saved search parameters 1: Default grid view
Start by naming the initial grid view as ‘default’, and click the “save” button.
All stored searches will also save the grid view configuration and design. So if you adjust the grid width or sort it, it will also store it for later use.
Once that is ready, let’s set a couple of search criteria for the grid and save them.
Saved search parameters 2: Active and full-time employees
Using the Filter Row, filter by typing “active” in the “Status” column and “full time” in the “Employee Type” column.
Then save the search as “fully-active”.
Saved search parameters 3: Extend parameter 1 for employees with salaries above $10000
Extend parameter 2 by right-clicking the Filter Row for the “Salary” column and setting it to greater than $10000.
Save the current search parameters as “highly-paid-staff”.
Now you have 3 saved search options: “default”, “fully-active”, and “highly-paid-staff”. You can easily switch between the 3 parameters and grid configurations from the “saved views menu.

Add visible UI for storing search preferences
For some users, having the saved search feature be more visible might be better. You can do this by adding an external toolbar to the layout.
You can extend the above UI further by creating a DynamicForm to display, store, and save your search preferences. With the SmartClient savedsearches component, you can provide a UI for saving searches, editing them, and applying them to a DataBoundComponent target.
The code should look like this:
isc.DynamicForm.create({
    ID: "gridView",
    width: 300,
    numCols: 2,
    autoDraw: false,
    fields: [
        {
            name: "savedSeachItem", title: "Grid View", showTitle: true, type: "SavedSearchItem", ID: "gridViewItem",
            targetComponent: "savedSearchGrid", width: 220, canAddSearch: true, canEditSearch: true, canRemoveSearch: true
        }
    ]
});
In the DynamicForm, specify the field to display the searches as SmartClient’s custom field type (savedSearchItem). Then set canAddSearch, canEditSearch, and canRemoveSearch to true. Bind the form to its targetComponent – “savedSearchGrid”. Ensure to add the “gridView” DynamicForm to the VLayout.
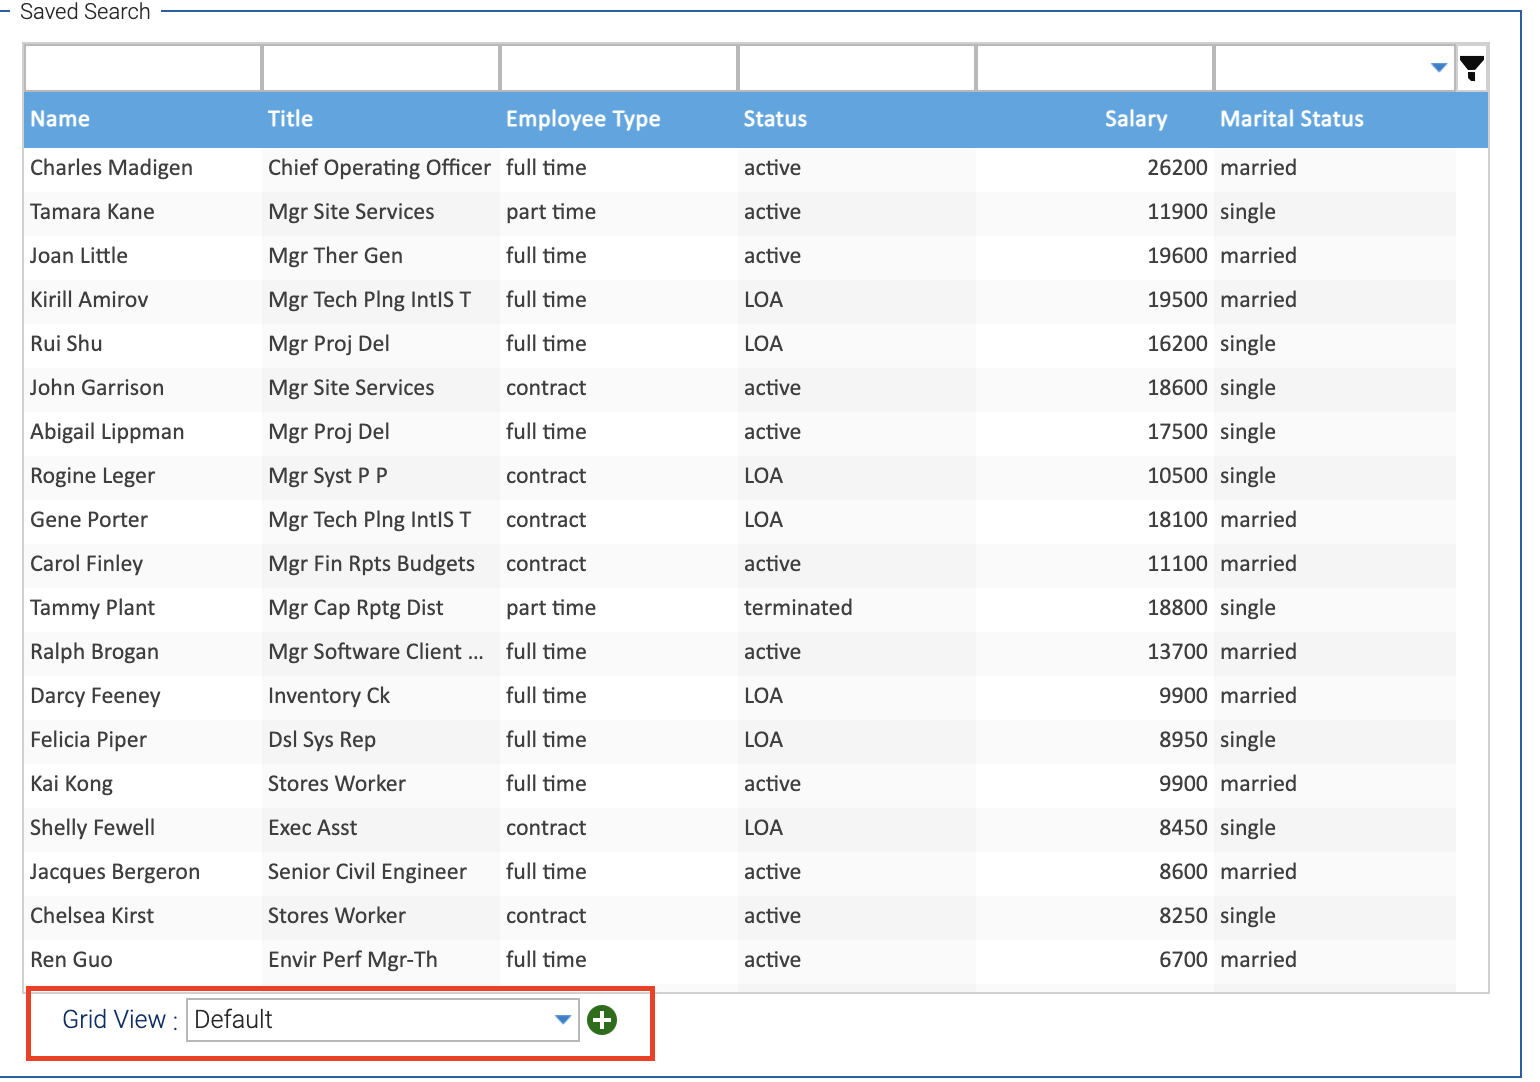
This automatically gets all stored searches and displays them visibly on the UI. You can also click the (+) button to add a new search.
Boost productivity with the SmartClient saved search feature
For many businesses with data-intensive applications, having a feature that lets users save search preferences is crucial.
Such a feature is not just about convenience — it helps redirect valuable time and effort towards other business-critical activities. As demonstrated in this blog post, SmartClient’s saved search feature lets you quickly retrieve search preferences and grid configurations.
If you want to implement this feature without writing any code, you can check out Reify. It is a low-code platform built on top of SmartClient.
Find out more in this blog post on creating saved searches on grids in Reify.